Style Tips & How-To
Genie Pants: Master the Art of Effortless Style
Genie pants are a fashion revelation, blending comfort with undeniable style. This guide will show you how to master this versatile garment, ensuring you look effortlessly chic whether dressed up or down.


Most fashion pieces demand compromise: comfort for style, or vice versa. Genie pants defy this rule, offering unparalleled ease without sacrificing an ounce of chic. These distinctive trousers have gracefully transitioned from bohemian staple to high-fashion statement, proving their enduring appeal and remarkable versatility. Understanding how to select the right pair and style them effectively is key to unlocking their full potential. This guide will take you through everything from fabric choices to accessorizing, ensuring your genie pants become a standout piece in your wardrobe.
Key Takeaways
- Genie pants offer exceptional comfort and can be styled for casual, smart-casual, and even semi-formal occasions.
- Choosing the right fabric, such as silk for elegance or linen for casual wear, is crucial for the desired aesthetic.
- Balance is key: pair the voluminous silhouette of genie pants with more fitted tops and sleek accessories.
- Avoid overly baggy tops and chunky footwear, which can overwhelm the overall look.
- Experiment with layering and statement jewelry to elevate your genie pant ensembles.
What Are Genie Pants and Their Enduring Appeal?
Genie pants, often synonymous with harem trousers, are characterized by their distinctive dropped crotch, loose fit around the hips and thighs, and tapered or elasticated ankles. Their name evokes the mystical, flowing garments seen in Middle Eastern folklore, famously associated with characters like Aladdin. While the specific origin often points to traditional attire from the Middle East and parts of Asia, their modern fashion interpretation gained traction in the early 20th century and has seen numerous revivals since. The enduring appeal of the genie pant lies in its unique blend of comfort and style. They offer freedom of movement unparalleled by more structured trousers, making them a favourite for travel, lounging, and everyday wear. Yet, with the right styling, they can transform into a sophisticated garment suitable for more elevated settings.
The Allure of the Silhouette: Why They Work
The exaggerated volume around the hips and thighs creates a dramatic, yet fluid, silhouette that’s both comfortable and visually interesting. This unique shape allows for excellent air circulation, making them ideal for warmer climates or simply for those who prefer a less restrictive fit. Practically speaking, the dropped crotch and tapered ankle design cleverly masks areas one might feel self-conscious about, while simultaneously creating a focal point around the lower leg and footwear. This interplay of generous fabric and defined finish is what makes them so captivating and, when styled correctly, incredibly flattering.

Genie pants have evolved from their traditional roots to become a versatile fashion staple.
Choosing Your Perfect Pair: Fabrics and Fit
Selecting the right genie pants starts with understanding fabric and fit. The material significantly influences how the trousers drape and the overall aesthetic.
- Cotton & Jersey: Excellent for casual wear, offering breathability and ease. Ideal for relaxed weekend looks or travel.
- Rayon & Modal: Known for their soft drape and smooth texture, these fabrics lend a slightly more refined feel, suitable for smart-casual ensembles.
- Linen: Perfect for summer, providing a crisp, natural texture and exceptional breathability, though prone to creasing.
- Silk & Satin: For truly elegant or evening looks, silk or satin genie pants offer a luxurious sheen and exquisite drape. These elevate the garment considerably.
When it comes to fit, ensure the waist is comfortable and secure, whether elasticated or drawstring. The dropped crotch should feel comfortable without being restrictive or excessively low, which can shorten the leg line. The ankle mastication or cuff should sit neatly without digging in.
Styling Genie Pants for Every Occasion
The true magic of genie pants lies in their styling versatility. With a few considered choices, you can transition them from beach holiday to boardroom (with caveats, of course).
Casual Chic
For an effortlessly cool daytime look, pair your cotton or linen genie pants with a simple fitted vest or a tucked-in graphic tee. White trainers or sleek flat sandals complete this relaxed yet polished ensemble. Add a crossbody bag and oversized sunglasses for a touch of urban flair.
Office Appropriate (Smart-Casual)
Can genie pants work in the office? Absolutely, with the right fabric and pairings. Opt for a pair in a refined fabric like rayon, Tercel, or even a lightweight wool blend. Combine with a crisp, tailored blouse – perhaps a classic white shirt from COS or a silk camisole layered under a structured blazer. Finish with elegant ballet flats, pointed loafers, or low block heels. This creates a sophisticated silhouette that respects professional boundaries while embracing comfort.

Choosing the right fabric is crucial for achieving the desired look and feel.
Evening Elegance
Transform your genie pants for an evening out by choosing a luxurious fabric such as silk or satin in a deep jewel tone or classic black. Pair with a delicate lace camisole, an off-the-shoulder top, or a sequined crop top for a glamorous edge. High heels or elegant heeled sandals are a must, along with a sleek clutch bag and statement jewelry. This ensemble offers a refreshing alternative to traditional evening dresses or tailored trousers.
Accessorising Your Genie Pants: The Finishing Touch
Accessories play a key role in defining the overall vibe of your genie pants outfit. Because the trousers themselves are a statement, your accessories should either complement or provide a striking contrast.
- Footwear: Opt for sleek and streamlined shoes. Flat sandals, delicate ballet pumps, elegant loafers, or pointed heels work beautifully. Avoid chunky trainers or heavy boots, which can make the look appear cumbersome.
- Bags: A structured handbag, a chic clutch, or a minimalist crossbody bag will balance the flowy nature of the pants. Oversized, slouchy bags can sometimes add too much volume.
- Jewellery: This is where you can truly express personal style. For a bohemian feel, layer delicate necklaces or wear beaded bracelets. For an elegant look, choose minimalist gold or silver pieces, or a single statement necklace from & Other Stories.
- Belts: If your genie pants have belt loops, a thin, elegant belt can cinch the waist and add definition, especially with a tucked-in top.
Genie Pants vs. Harem Pants: A Subtle Distinction
While often used interchangeably, there can be a subtle distinction between genie pants and harem pants. Harem pants typically refer to the broader category of loose-fitting trousers with a dropped crotch, often inspired by traditional Middle Eastern garments. Genie pants, in modern fashion parlance, tend to imply a slightly more exaggerated drop and a more pronounced taper at the ankle, often with elasticated cuffs, giving them that distinct ‘genie lamp’ silhouette. However, the differences are minimal, and many brands use either term to describe the same style of trousers. The key elements — comfort, volume, and tapered ankles — remain consistent across both.
Pros and Cons of Embracing the Genie Pant Trend
Pros
- Unmatched Comfort: The loose fit allows for incredible freedom of movement.
- Versatile Styling: Easily dressed up or down for various occasions.
- Unique Silhouette: Offers a distinctive, fashion-forward look.
- Breathable Fabrics: Often made from lightweight materials, perfect for warmer weather.
- Travel-Friendly: Comfortable for long journeys and resistant to creasing in certain fabrics.
Cons
- Proportion Challenges: Can visually shorten legs on petite frames if not styled carefully.
- Risk of Appearing Casual: Without thoughtful styling, they can look too relaxed or pyramidlike.
- Limited Formality: Rarely suitable for highly formal events, even in luxurious fabrics.
- Finding the Right Fit: The dropped crotch can be hit or miss depending on personal preference and body shape.
Common Styling Mistakes to Avoid
Even the most stylish garments can fall flat with common errors. Avoid these pitfalls to ensure your genie pants always look chic:
- Overly Baggy Tops: Pairing loose genie pants with an equally baggy top can overwhelm your frame and create an unflattering, shapeless silhouette. Always aim for balance.
- Wrong Footwear: Chunky trainers, clunky boots, or overly casual flip-flops can detract from the elegance of the pants. Stick to sleek, refined options.
- Ignoring Proportions: For petite individuals, an excessively dropped crotch can make legs appear shorter. Counter this with a high-waisted fit and vertical elements in your top or accessories.
- Incorrect Fabric for Occasion: Wearing jersey genie pants to a semi-formal event will look out of place. Match the fabric’s formality to the occasion.
- Over-Accessorising: Let the pants be the star. Too many bold accessories can make the outfit appear cluttered.
Expert Tips for Elevating Your Genie Pant Look
Having advised on countless wardrobe transformations, I’ve seen first-hand how transformative a well-styled pair of genie pants can be. Here are some expert insights to truly make them shine:
- Embrace the Tuck: Tucking in your top, even partially, helps define your waist and creates a more polished look, especially with high-waisted genie pants. This subtle detail makes a significant difference.
- Layer Strategically: A fitted camisole under an open, lightweight blazer or a longline cardigan can add sophistication and depth without adding bulk. Choose pieces that skim your frame.
- Play with Texture: Contrast the fluidity of the pants with textured tops – a ribbed knit, a silk blouse, or a structured linen shirt. This adds visual interest and elevates the ensemble.
- Monochromatic Magic: A head-to-toe monochromatic look in a neutral tone (black, white, beige) or a rich colour (deep green, navy) instantly reads as luxurious and sophisticated.
- Consider the Hemline: For a more contemporary feel, ensure the ankle cuff hits just above or at the ankle bone. This elongates the leg and highlights your footwear.

Avoid common pitfalls to ensure your genie pants outfit always looks polished.
Frequently Asked Questions
Are genie pants still in fashion in 2026?
Yes, genie pants remain a strong presence in fashion in 2026. While their popularity ebbs and flows, their comfort and unique style ensure they consistently reappear on runways and in street style, particularly in elevated fabrics and sophisticated colour palettes. They are now considered a versatile classic rather than just a fleeting trend.
What tops pair best with genie pants?
Fitted tops generally pair best with genie pants to balance their voluminous lower half. Think sleek vests, tailored blouses, fitted knitwear, or tucked-in t-shirts. Crop tops also work well by highlighting the waist and creating an appealing proportion, especially for high-waisted styles.
Can petite individuals wear genie pants?
Absolutely, petite individuals can wear genie pants successfully. The key is to choose pairs with a less exaggerated dropped crotch and ensure the ankle cuff hits precisely at the ankle to avoid shortening the leg line. Pairing them with heels or platform sandals can also help elongate the silhouette.
What is the difference between palazzo and genie pants?
Palazzo pants are wide-legged trousers that are generally loose from the waist all the way down to the hem, offering a flowing, uniform width. Genie pants, by contrast, feature a distinct dropped crotch and taper significantly at the ankle, often with an elasticated cuff, creating a more gathered and bulbous silhouette around the hips.
How do I make genie pants look less casual?
To make genie pants look less casual, choose them in luxurious fabrics like silk, satin, or refined rayon. Pair them with tailored pieces like a blazer or a crisp button-down shirt. Elevate the look further with high heels, a structured handbag, and elegant jewelry. Monochromatic styling also adds a touch of sophistication.
What types of shoes should I avoid with genie pants?
Avoid overly chunky trainers, heavy boots, or very casual flip-flops when styling genie pants for an elevated look. These can create an imbalance with the fluid silhouette of the trousers, making the overall outfit appear unpolished or cumbersome. Opt for sleek, refined footwear instead.
Are genie pants comfortable for travel?
Genie pants are exceptionally comfortable for travel due to their loose fit and often breathable fabrics. They allow for maximum movement during long journeys and can be easily dressed up or down upon arrival, making them a practical and stylish choice for any trip. Genie pants are more than just a passing trend; they are a testament to the idea that comfort and style can coexist beautifully. By understanding their unique silhouette, choosing appropriate fabrics, and applying smart styling techniques, you can effortlessly incorporate these versatile trousers into your wardrobe. Embrace their distinctive charm and make them a cornerstone of your personal style, ready for any occasion. For more on versatile wardrobe essentials, explore our guide. Information current as of July 2026; pricing and product details may change.
Related Articles
- Popular Lingerie Styles for Women in 2026: The Definitive Guide
- Light Wash Jeans: The Ultimate Guide to Styling & Care
- PCA Toner: Elevate Your Skincare Regimen












Style Tips & How-To
Taming the Tresses: Your Expert Guide to Shampoo for Oily Greasy Hair
Why does your hair feel greasy barely a day after washing? Finding the right shampoo for oily greasy hair can transform your routine. This guide offers expert tips, ingredient insights, and practical advice to achieve fresh, balanced locks.

Why does your hair feel greasy barely a day after washing? It’s a common dilemma, but finding the right shampoo for oily greasy hair can transform your routine. For many, the constant battle against limp, shiny roots feels like an endless cycle. The good news is that understanding your scalp’s needs and selecting specific formulations can break this pattern, leading to fresher, more balanced hair.
- Target clarifying and balancing ingredients like salicylic acid, tea tree oil, and clay to control sebum.
- Avoid harsh sulphates in daily use that can trigger rebound oil production, especially if your scalp is sensitive.
- Focus shampoo application primarily on the scalp, massaging thoroughly, and avoid over-conditioning hair ends.
- Consider a rebalancing routine that supports a healthy scalp microbiome for long-term oil control.
- Over-washing can exacerbate oiliness; aim for a sustainable washing schedule that gradually extends time between washes.
Understanding Oily Hair: More Than Just a Shine
Oily hair isn’t just about an aesthetic; it’s a reflection of your scalp’s sebum production. Sebum is a natural oil produced by the sebaceous glands to keep skin and hair moisturised and protected. However, an overproduction of sebum can lead to that characteristic greasy, limp appearance and can even contribute to scalp issues like dandruff or itchiness. Several factors influence how oily your hair becomes. Genetics play a significant role, meaning some individuals are naturally predisposed to an oilier scalp. Hormonal fluctuations, stress, diet, and even environmental factors can also trigger increased sebum production. Practically speaking, identifying these triggers can be as important as choosing the right shampoo.
Key Ingredients to Seek Out in Shampoo for Oily Greasy Hair
When selecting a shampoo for oily greasy hair, the ingredient list is your best friend. Look for active ingredients that specifically target sebum regulation and deep cleansing without being overly harsh. These formulations aim to balance, not strip, the scalp. Salicylic acid is an excellent choice as a beta-hydroxy acid that exfoliates the scalp, breaking down oil and dead skin cells. Tea tree oil, a natural antiseptic, helps to purify the scalp and reduce bacteria that can exacerbate oiliness. Clay-based ingredients, such as kaolin or bentonite, are also highly effective at absorbing excess oil and impurities from the scalp. According to a 2026 review in the International Journal of Trichology, formulations combining these types of active ingredients often show the most promising results for long-term oil control.
The Over-Washing Cycle: Breaking Free from Greasy Hair
A common mistake people make with oily hair is washing it too frequently, sometimes daily. While this might seem intuitive for removing grease, it can actually backfire. Each wash, especially with harsh sulphates, strips the scalp of its natural oils, signalling the sebaceous glands to produce even more sebum to compensate. This creates a vicious cycle: you wash, your scalp overproduces oil, and your hair feels greasy faster, leading you to wash again. Breaking this cycle involves gradually extending the time between washes, allowing your scalp’s natural oil production to rebalance. This might mean starting with washing every other day, then every two days, using dry shampoo as a bridge.
Choosing Your Arsenal: Types of Shampoos for Oily Hair
Not all shampoos for oily hair are created equal. Understanding the different types can help you make a more informed choice for your specific needs. Clarifying Shampoos: These are designed for a deep cleanse, removing heavy product build-up, excess oil, and environmental pollutants. They often contain stronger cleansing agents, which can be great for a weekly or bi-weekly reset. However, daily use can be too stripping for some scalps, leading to the rebound oiliness discussed earlier. Balancing or Regulating Shampoos: These aim to gently cleanse while regulating sebum production over time. They often contain milder surfactants and ingredients like zinc PCA or niacinamide that help to normalise scalp function. These are generally better for more frequent use, especially if you have a sensitive scalp. Sulphate-Free Shampoos: While sulphates create a rich lather and are excellent cleansers, they can sometimes be too harsh for sensitive or oily scalps, potentially causing irritation and encouraging oil production. Sulphate-free options use gentler cleansing agents, offering a milder experience. However, some sulphate-free formulas might not feel as ‘clean’ initially, and it can take time for your scalp to adjust.
| Shampoo Type | Purpose | Key Ingredients | Frequency of Use | Ideal For | Potential Drawbacks |
|---|---|---|---|---|---|
| Clarifying | Deep cleanse, remove build-up & oil | Strong surfactants, salicylic acid | Weekly/Bi-weekly | Heavy oiliness, product build-up | Can be stripping, lead to rebound oiliness if overused |
| Balancing/Regulating | Gentle cleanse, sebum control | Zinc PCA, niacinamide, milder surfactants | Regular use (daily/every other day) | Moderate oiliness, sensitive scalps | May take longer to see significant oil reduction |
| Sulphate-Free | Gentle cleansing, less irritation | Plant-derived cleansers | Regular use | Sensitive scalp, mild oiliness | Less lather, may feel less ‘clean’ initially, potentially higher price |
How to Properly Wash Oily Hair: Technique Matters
Even with the perfect shampoo for oily greasy hair, incorrect washing techniques can undermine your efforts. The way you apply and rinse your shampoo significantly impacts its effectiveness. Firstly, focus the shampoo directly onto your scalp, where the oil originates. Use your fingertips to gently massage the shampoo into your scalp for at least one to two minutes. This helps to lift dirt, oil, and dead skin cells. Lathering the product through the lengths of your hair is often unnecessary and can strip the ends, which are typically drier. Rinse thoroughly with lukewarm water until your hair feels squeaky clean, as any residue can contribute to a greasy feel.
Decoding Product Labels: What to Look For (and Avoid)
Beyond the active ingredients, understanding other terms on shampoo labels can guide your choice. Look for labels that state ‘volumising’, ‘balancing’, ‘purifying’, or ‘clarifying’. These usually indicate formulations suitable for oily hair. Steer clear of shampoos marketed as ‘hydrating’, ‘moisturising’, ‘smoothing’, or ‘for dry/damaged hair’, as these often contain heavier oils and conditioning agents that will only weigh down oily strands. Similarly, be wary of products with heavy silicones (ingredients ending in -cone, -conol, -xane) in higher concentrations, as these can create a film on the hair and scalp, contributing to build-up and a greasy feel over time. For surface-material comparisons, see.
Budget-Friendly Solutions: Effective Shampoos Without the High Price Tag
Effective shampoo for oily greasy hair doesn’t always mean spending a fortune. Many high street brands offer excellent formulations that compete with their luxury counterparts. For example, some popular drugstore brands offer clarifying shampoos with salicylic acid or tea tree oil for as little as £5-£10, according to a 2026 market survey. These often provide comparable results to more expensive options, especially for moderate oiliness. The key is to focus on the active ingredients rather than brand prestige. Many affordable brands now incorporate advanced scalp-balancing technologies that were once exclusive to salon products. Always check reviews, but remember that individual results can vary depending on your unique scalp chemistry.
Beyond the Bottle: Complementary Hair Care for Greasy Scalps
While shampoo is foundational, a complete approach to managing oily hair can yield better, longer-lasting results. Consider using a lightweight, non-comedogenic conditioner, applied only to the mid-lengths and ends of your hair, never near the roots. A weekly scalp scrub or mask formulated with clay or charcoal can also help to absorb excess oil and exfoliate the scalp more deeply than shampoo alone. Dry shampoo is another invaluable tool, extending the time between washes. Apply it to your roots when your hair is clean, not already greasy, to absorb oil proactively. Regularly cleaning your hairbrushes and pillowcases can also prevent the transfer of oil and product residue back onto your clean hair. Exploring different styling products for fine hair can help too Hair Perm Beach Waves: Avoiding Common Mistakes for Perfect Style.
Common Mistakes When Caring for Oily Hair
Even with the best intentions, certain habits can inadvertently worsen oily hair. One prevalent mistake is using excessively hot water to wash your hair. Hot water can stimulate sebaceous glands, leading to increased oil production. Opt for lukewarm water instead. Another error is touching your hair too frequently throughout the day. Every time you run your hands through your hair, you transfer oils and dirt from your skin to your strands, exacerbating greasiness. Similarly, over-brushing can distribute oil from the scalp down the hair shaft, making the ends appear greasy faster. Limiting manipulation and using clean tools are simple yet effective solutions.
Expert Tips for Managing Oily Hair
Having covered beauty and hair care for Blush Mag for several years, I’ve observed that consistency and patience are paramount when tackling oily hair. It’s not about finding a magic bullet, but establishing a routine that respects your scalp’s natural balance. One tip often overlooked is the double cleanse. The first wash helps to break down and lift surface oil and grime, while the second allows the active ingredients in your shampoo to truly purify and treat the scalp. This technique can be particularly beneficial if you use a lot of styling products. Also, consider the impact of your diet; some experts suggest a diet rich in omega-3 fatty acids and zinc can support overall skin and scalp health, potentially influencing sebum production. For more on dietary impacts, check.
Frequently Asked Questions
How often should I wash oily hair?
Initially, aim for every other day, gradually extending to every two or three days. This allows your scalp’s sebum production to rebalance. Use dry shampoo on off-days to absorb excess oil and extend freshness.
Can diet affect oily hair?
While research is ongoing, some evidence suggests that diets high in refined sugars and unhealthy fats might contribute to increased sebum production. Focusing on a balanced diet rich in vitamins and minerals could support healthier scalp function.
Are sulphate-free shampoos good for oily hair?
Yes, many sulphate-free shampoos are excellent for oily hair, especially if your scalp is sensitive. They cleanse gently without harsh stripping, which can prevent the scalp from overproducing oil as a compensatory mechanism.
What if my hair is oily at the roots but dry at the ends?
This common issue requires a dual approach. Use a shampoo for oily greasy hair focused on your scalp, and a lightweight conditioner applied only to your mid-lengths and ends, avoiding the roots entirely.
How much shampoo should I use?
A coin-sized amount is usually sufficient for most hair lengths. Overusing shampoo can create too much lather, making it harder to rinse thoroughly and potentially leaving residue that contributes to greasiness.
Do dry shampoos help oily hair?
Yes, dry shampoos are invaluable for oily hair. They absorb excess oil, add volume, and extend the time between washes. Apply them to your roots before hair gets visibly greasy for best results.
Conclusion
Managing oily greasy hair is a journey of understanding your scalp and making informed product choices. By selecting shampoos with the right balancing and clarifying ingredients, adopting proper washing techniques, and incorporating complementary scalp care, you can break the cycle of excessive oiliness. Remember, consistency is key, and finding a routine that works for your unique needs will lead to a healthier, fresher-looking mane. Information current as of August 2026; pricing and product details may change.




Style Tips & How-To
Beyond the Strip: Your Strategic Guide to Clarifying Shampoo
Clarifying shampoo isn’t just for extreme build-up; it’s a strategic tool. Learn how to use it effectively to revitalise your hair and scalp.

Does your hair feel heavy, look dull, or resist styling, even after a fresh wash? Many of us fall into the trap of thinking more shampoo means cleaner hair, but often, it’s the type of shampoo –, and the strategy – that makes all the difference. Clarifying shampoo is your hair’s reset button, designed to strip away the accumulated residue that everyday shampoos simply can’t handle. However, it’s not about harsh stripping; it’s about a strategic cleanse that restores vitality. This guide will show you how to harness the power of a deep clean without compromising your hair’s health, ensuring your strands feel light, look vibrant, and respond better to your styling efforts.
- Clarifying shampoo removes product build-up, hard water minerals, and environmental pollutants that regular shampoos miss.
- Differentiate between clarifying shampoos (for product residue) and chelating shampoos (specifically for mineral deposits).
- The ideal frequency of use depends heavily on your hair type, lifestyle, and the products you use regularly.
- Always follow a clarifying wash with a deeply hydrating conditioner or hair mask to restore moisture balance.
- Over-clarifying can lead to dryness, frizz, and scalp irritation, so listen to your hair’s signals.
What is Clarifying Shampoo, Really? Beyond the Basic Cleanse
At its core, clarifying shampoo is a potent deep cleansing shampoo formulated to remove more than just daily dirt and oil. It targets stubborn residues that build up on your hair and scalp over time, which regular shampoos often can’t penetrate. Think of it as hitting the reset button for your hair. These residues include silicones, polymers, waxes from styling products, dry shampoo particles, and even environmental pollutants. The secret lies in its higher concentration of stronger surfactants (cleansing agents) compared to your everyday shampoo, designed to dissolve and wash away these clingy substances. The result is hair that feels truly clean, lighter, and often looks shinier because the dulling film has been removed. It also prepares your hair to better absorb the benefits of conditioners, masks, and treatments that follow.
The Silent Saboteurs: Why Your Hair Needs a Reset
Many factors contribute to hair and scalp build-up, leaving your strands feeling weighed down and less vibrant. Product accumulation is a major culprit; daily use of styling creams, gels, mousses, and especially dry shampoo, leaves behind a film that regular washing may not fully remove. Hard water is another significant factor. Water with high mineral content, like calcium and magnesium, leaves deposits on the hair cuticle. These minerals can make hair feel rough, look dull, and even affect colour vibrancy. According to a 2018 study published in the International Journal of Cosmetic Science, hard water can lead to increased hair breakage and reduced elasticity over time, underscoring the need for specific treatments to counter its effects. Environmental aggressors like pollution, smoke, and dust also cling to hair, further contributing to the problem. Over time, this cocktail of residues can clog hair follicles, potentially leading to scalp irritation, itchiness, and even hindering healthy hair growth. A good clarifying shampoo is designed to tackle these issues head-on, revitalizing your hair and scalp.
Clarifying vs. Chelating Shampoo: Know the Difference
While often used interchangeably, clarifying and chelating shampoos serve distinct purposes, and understanding the difference is key to effective hair care. A standard clarifying shampoo primarily focuses on removing product build-up, excess oil, and general environmental grime using strong surfactants like Sodium Laureth Sulfate. Chelating shampoos, on the other hand, are specifically formulated to target and remove mineral deposits from hard water. They contain chelating agents such as EDTA (ethylenediaminetetraacetic acid), phytic acid, or ascorbic acid, which bind to metal ions like calcium, magnesium, copper, and iron, allowing them to be rinsed away.
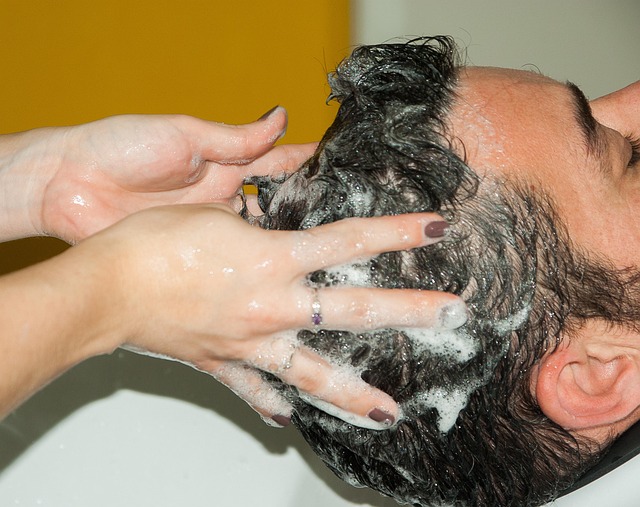
If you live in an area with hard water, or notice your hair feels stiff, brassy, or develops a greenish tint (especially blonde hair), a chelating shampoo is the more precise tool. For general product residue and occasional deep cleaning, a clarifying shampoo is usually sufficient. Some products combine both functions, offering a complete hair detox shampoo.
How to Integrate Clarifying Shampoo into Your Hair Routine
The frequency of using clarifying shampoo is highly personal and depends on several factors: your hair type, how many styling products you use, whether you have hard water, and even your activity level. There’s no one-size-fits-all answer, but a balanced approach is crucial to avoid over-stripping.
- Assess Your Needs: If you use a lot of dry shampoo, heavy serums, or have an oily scalp, you might benefit from a clarifying wash every 1–2 weeks. For those with fine hair that easily gets weighed down, a bi-weekly cleanse can restore bounce.
- Start Slowly: If you’re new to clarifying, begin by using it once a month. Observe how your hair responds. Does it feel lighter? Is your scalp less oily? If so, you can gradually increase the frequency if needed.
- Focus on the Scalp: Apply the clarifying shampoo primarily to your scalp and roots, where most build-up occurs. Gently work it through to the ends only if there’s significant product residue there.
- Lather and Rinse Thoroughly: Ensure you create a good lather and rinse your hair meticulously until the water runs clear and your hair feels squeaky clean. This ensures all the dissolved residues are washed away.
- Always Follow with Hydration: This step is non-negotiable. Clarifying shampoos can be drying, so immediately follow with a rich, hydrating conditioner or a deep conditioning hair mask to replenish moisture.
For individuals with sensitive scalps or coloured hair, opting for a sulfate-free clarifying shampoo can offer a gentler cleanse while still being effective. Purple Shampoo: The Ultimate Guide to Cool Blonde Hair for more on choosing the right shampoo for sensitive scalps.
Tailoring the Cleanse: Clarifying for Every Hair Type
Understanding your hair type is paramount when deciding on the best approach to clarifying. Each hair texture and condition reacts differently to a deep cleanse.
- Oily Hair & Fine Hair: These types tend to accumulate oil and product residue quickly, leading to limpness. A clarifying shampoo can be highly beneficial, used perhaps every 1–2 weeks to maintain volume and freshness. Opt for formulas that balance oil without over-drying.
- Curly & Textured Hair: Often requires richer, heavier styling products, making build-up a common issue. However, curly hair is also prone to dryness. Choose a sulfate-free clarifying shampoo and use it less frequently, perhaps every 3–4 weeks. Always follow with an intense moisturizing treatment to prevent frizz and maintain curl definition.
- Coloured Hair: Clarifying shampoos can potentially strip colour, especially if they contain harsh sulfates. If you have coloured hair, opt for colour-safe, sulfate-free clarifying formulas and use them sparingly – once a month or less. Focus on the scalp and rinse quickly. A common mistake is to clarify immediately after coloring; wait at least a week.
- Dry & Damaged Hair: This type needs the gentlest approach. Excessive clarifying can exacerbate dryness and damage. Limit use to once every 4–6 weeks, or only when absolutely necessary (e.g., after swimming in chlorinated water). Prioritise hydration immediately after.
- Chemically Treated Hair (Relaxed, Permed): Similar to damaged hair, chemically treated strands are more vulnerable. Use very gentle, sulfate-free options and keep frequency to a minimum, perhaps every 6–8 weeks, coupled with deep conditioning.
Post-Clarify Care: Rebalancing Your Strands
The step immediately following your clarifying wash is just as crucial as the cleanse itself. Clarifying shampoos, by their very nature, can strip away not only unwanted build-up but also some of the natural oils that protect your hair. Neglecting to reintroduce moisture can leave your hair feeling dry, brittle, and prone to frizz. After thoroughly rinsing out your clarifying shampoo, apply a rich, deeply hydrating conditioner or, even better, a restorative hair mask. Focus on the mid-lengths to ends, ensuring every strand is coated. Leave the product on for the recommended time – typicall5–1010 minutes for a conditioner or 15–30 minutes for a mask – allowing it to penetrate and replenish lost moisture. For an extra boost, consider a leave-in conditioner or a few drops of hair oil on damp hair before styling. This post-clarify care routine ensures your hair remains soft, manageable, and healthy.

Shampoo Showdown: Clarifying, Chelating, and Daily Formulas Compared
To help you choose the right product for your hair’s needs, here’s a comparison of different shampoo types:
| Shampoo Type | Primary Action | Key Ingredients (Examples) | Frequency of Use | Best For |
|---|---|---|---|---|
| Daily/Regular Shampoo | Gentle cleansing, maintains daily hygiene, light conditioning. | Milder surfactants (e.g., Cocamidopropyl Betaine), conditioning agents. | Daily to every few days. | General hair cleaning, maintaining hair health. |
| Clarifying Shampoo | Deep cleansing, removes product build-up, excess oil, environmental residue. | Stronger surfactants (e.g., Sodium Laureth Sulfate), sometimes fruit extracts. | Every 1–4 weeks, depending on hair type & product use. | Hair heavy with styling products, oily scalps, before chemical treatments. |
| Chelating Shampoo | Removes mineral deposits from hard water, chlorine, and heavy metals. | Chelating agents (e.g., EDTA, Phytic Acid, Ascorbic Acid). | Every 2–6 weeks, or as needed in hard water areas. | Hair exposed to hard water, swimming pool water, metallic discoloration. |
The Pros and Cons of a Deep Cleanse
While clarifying shampoo offers significant benefits, it’s important to understand its potential drawbacks to use it effectively.
Advantages of Clarifying Shampoo
- Removes Build-up: Effectively strips away silicones, waxes, oils, and environmental pollutants that weigh hair down.
- Boosts Volume & Shine: By removing residue, hair can regain its natural bounce, body, and reflective shine.
- Enhances Product Effectiveness: Allows conditioners, masks, and treatments to penetrate hair more deeply, improving their performance.
- Prepares Hair: Ideal before chemical treatments like coloring or perming, ensuring even absorption and better results.
- Relieves Scalp Issues: Can alleviate itchy or oily scalps caused by clogged follicles and product residue.
Potential Drawbacks
- Can Be Drying: Strong surfactants can strip natural oils, leading to dryness, especially for already dry or damaged hair.
- May Fade Colour: For colour-treated hair, frequent or harsh clarifying can prematurely strip dye molecules, leading to faded colour.
- Scalp Irritation: Overuse can irritate sensitive scalps, causing redness, flakiness, or increased oil production as the scalp tries to compensate.
- Not for Daily Use: Its potent cleansing action means it’s unsuitable for everyday washing, which could lead to damaged hair over time.
- Can Make Hair Feel ‘Squeaky’: The intense clean can sometimes leave hair feeling slightly rough or ‘squeaky’ before conditioning.
Recognising the Red Flags: Signs of Over-Clarifying
While clarifying shampoo is beneficial, using it too often or with too strong a formula can do more harm than good. Your hair will send clear signals if you’re over-clarifying. One of the most common signs is excessive dryness and frizz. If your hair feels unusually rough, brittle, or develops a straw-like texture, it’s likely been stripped of too many natural oils. You might also notice increased static or difficulty managing your hair. Another indicator is scalp irritation. An itchy, flaky, or overly sensitive scalp can signal that you’re disrupting its natural barrier. Paradoxically, your scalp might also become more oily, as it attempts to overcompensate for the dryness by producing more sebum. If your coloured hair seems to fade much faster than usual, that’s another red flag. When these signs appear, it’s time to reduce your clarifying frequency and focus on intense hydration.
Expert Insights and Common Clarifying Mistakes to Avoid
In my years observing hair care routines, a common oversight is treating clarifying shampoo like just another wash. It’s a targeted treatment, and a little strategic thinking goes a long way. Many assume a clarifying shampoo is only for when hair feels absolutely awful, but regular, measured use can prevent that stage entirely. A frequent mistake is applying clarifying shampoo to dry or barely damp hair. This prevents it from distributing evenly and working effectively. Always thoroughly wet your hair first. Also, resist the urge to vigorously scrub your scalp, especially if it’s sensitive; gentle massage is sufficient to dislodge build-up. For instance, if you regularly use a heavy leave-in cream, consider a sulfate-free clarifying shampoo once every two weeks to prevent accumulation without harshness. Don’t skip the deep conditioner or hair mask. This is a crucial recovery step. Think of clarifying as a deep clean for your home; you wouldn’t leave it empty and bare afterwards, would you? You’d replenish and nourish. The same applies to your hair. Finally, avoid using clarifying shampoo immediately before or after a colour treatment. Before coloring, it can make hair porous, leading to uneven colour. After coloring, it will strip your fresh hue. For optimal colour longevity, consult your colorist on product choices. Brow Lamination Before and After: Your Complete Guide for tips on maintaining vibrant hair colour.

Frequently Asked Questions
Can clarifying shampoo remove hair dye?
Yes, clarifying shampoo can strip hair dye, especially if it contains strong sulfates and is used frequently or on fresh colour. While it won’t completely remove permanent dye, it can significantly fade semi-permanent and temporary colours. Use colour-safe, sulfate-free options sparingly if you have dyed hair.
How often should I use clarifying shampoo for an oily scalp?
For an oily scalp, using clarifying shampoo every 1–2 weeks can be beneficial to manage oil production and prevent build-up. However, monitor your scalp’s response; if it becomes too dry or irritated, reduce the frequency. Always follow with a balancing conditioner.
Is clarifying shampoo bad for fine hair?
No, clarifying shampoo is not inherently bad for fine hair. In fact, fine hair often benefits greatly from the removal of residue that can weigh it down and make it appear flatter. The key is to use a gentle formula and not overdo it, perhaps once every two weeks, always followed by a light conditioner.
What ingredients should I look for in a good clarifying shampoo?
Look for ingredients like Sodium Laureth Sulfate (for strong cleansing), Sodium C14-16 Olefin Sulfonate, or Coco-Betaine (for milder options). For hard water, seek chelating agents like EDTA, Phytic Acid, or Ascorbic Acid. Natural extracts like apple cider vinegar or witch hazel can also offer clarifying benefits.
Do I need to use conditioner after clarifying shampoo?
Absolutely, yes. Using a rich, hydrating conditioner or hair mask after clarifying shampoo is essential. Clarifying products can strip hair of moisture, so conditioning immediately afterwards helps to restore hydration, smooth the cuticle, and prevent dryness and frizz.
Can I use clarifying shampoo if I have keratin-treated hair?
It’s generally not recommended to use traditional clarifying shampoos on keratin-treated hair, as the strong sulfates can strip away the keratin treatment prematurely. If a deep cleanse is necessary, opt for a sulfate-free, keratin-safe clarifying shampoo and use it very sparingly, focusing on the scalp.
Conclusion: Your Path to Healthier Hair
Clarifying shampoo is far more than a harsh stripping agent; it’s a strategic tool for maintaining optimal hair and scalp health. By understanding its purpose, differentiating it from chelating formulas, and tailoring its use to your specific hair type, you can unlock lighter, shinier, and more vibrant hair. Remember, the goal is not to eliminate all natural oils, but to remove the unwanted build-up that hinders your hair’s true potential. Integrate clarifying shampoo thoughtfully into your routine, always follow with profound hydration, and listen to your hair’s unique signals. Your strands will thank you for this smart, revitalizing approach. Information current as of August 2026; pricing and product details may change.




Style Tips & How-To
Dirty Blonde Hair: The Effortless Shade That Defines
Dirty blonde hair is more than just a colour; it’s a statement of effortless elegance. This guide explores how to achieve and maintain this versatile shade, ensuring your locks look naturally stunning.

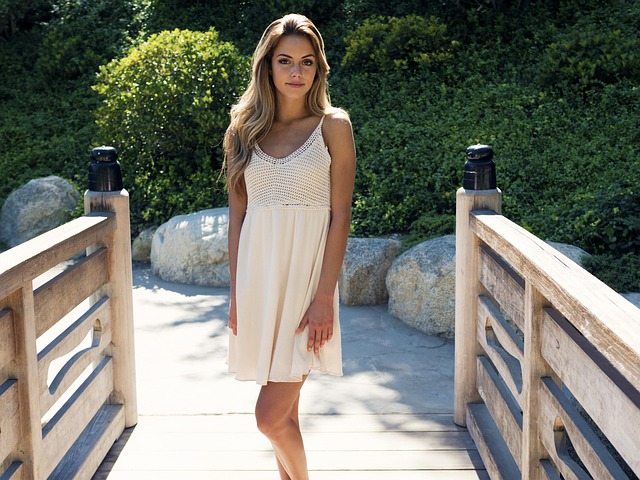
posure, followed by some natural growth – a beautiful blend of lighter strands and deeper, cooler or warmer bases. It sits comfortably between light brown and bright blonde, offering a sophisticated, lived-in feel. Unlike platinum or bright blonde, dirty blonde embraces dimension, incorporating natural lowlights and highlights that give it a rich, organic appearance. This depth is what makes it so flattering and forgiving. Practically speaking, it’s a darker blonde that might lean ashier (cooler, more grey-brown) or golder (warmer, more caramel-brown) depending on your preference and natural hair colour. This versatility is a key reason for its enduring popularity.
The Allure of Effortless Chic: Why Dirty Blonde Reigns
The primary appeal of dirty blonde hair lies in its inherent effortlessness. In a world craving authenticity and natural beauty, this shade provides a perfect balance. It’s not stark, it’s not overly dyed, and it doesn’t scream for constant attention. What this means in practice: a softer grow-out. If your natural hair colour is light brown or a darker blonde, the transition from your roots to your dirty blonde lengths will be far less noticeable than with a stark platinum. This translates to fewer salon appointments and less stress about visible root lines, making it a truly low-maintenance blonde option. According to a 2025 trend report by L’OréalProfessionall, natural-looking, blended hair colours continue to dominate, with dirty blonde specifically highlighted for its ability to offer brightness without the commitment of high-contrast shades. It allows for sophistication without appearing overly styled.
Choosing Your Dirty Blonde Tone: Ash, Golden, or Honey?
The beauty of dirty blonde is its adaptability, largely due to the range of undertones available. This is where the real art of the shade comes into play, ensuring it perfectly complements your complexion. Ash Dirty Blonde: This tone features cool, reddish-brown undertones, often appearing slightly smoky or sandy. It works beautifully on individuals with cool skin undertones (those who burn easily, have pinkish skin, or blue/purple veins). An ash tone helps to neutralize any unwanted redness in the skin and provides a sophisticated, almost iridescent finish. Golden Dirty Blonde: For those with warmer skin undertones (who tan easily, have yellowish or peach skin, or green veins), a golden dirty blonde is often ideal. This shade incorporates warmer, buttery, or caramel hues, adding a sun-kissed glow without appearing brassy. It can brighten the complexion and give a healthy, vibrant look. Honey Dirty Blonde: A richer, deeper warm tone, honey dirty blonde offers a beautiful blend of golden blonde and light brown. It’s often chosen by those who want warmth but prefer a slightly darker, more opulent feel. It’s particularly stunning on medium skin tones, enhancing their natural warmth. A simple test: look at the veins on your wrist. If they appear blue or purple, you likely have cool undertones. If they look green, you’re probably warm. If you see a mix, you might be neutral and can pull off either.
Achieving the Perfect Dirty Blonde: Salon vs. Home
Getting the ideal dirty blonde shade requires a nuanced approach. While some might consider a DIY attempt, a professional colorist is generally recommended for the best, most natural-looking results. At the Salon:
- Balayage: This freehand painting technique creates soft, natural-looking highlights that are concentrated towards the ends, mimicking sun-kissed hair. It allows for a smooth blend with your natural root colour, making it an excellent choice for a low-maintenance dirty blonde. The grow-out is incredibly soft, meaning fewer touch-ups.
- Highlights/Foliage: Traditional highlights can be used to create a more uniform lift, while foliage combines balayage with foils for a stronger, more defined lift. For dirty blonde, a colorist will often use a combination of fine highlights in varying shades (light blonde, medium blonde, light brown) to create the multi-tonal effect.
- Root Smudge/Melt: For those already blonde, a colorist might apply a darker, ashier shade to the roots and feather it down a few inches. This creates a softened transition between your natural root and the lighter lengths, achieving that quintessential dirty blonde look without a harsh line. This technique is a major shift for extending the life of your colour.
At Home: Attempting dirty blonde at home, particularly if you’re starting from very dark or very light hair, carries risks. Uneven colour, brassiness, or an unnatural finish are common pitfalls. If you do proceed, choose a high-quality box dye specifically labelled as ‘dark ash blonde’ or ‘light golden brown’ to avoid overly warm results. Always perform a strand test first to see how the colour develops on your hair. Starting with pre-lightened hair can also lead to unpredictable porosity, affecting dye absorption.
Maintaining Your Dirty Blonde Brilliance
Even though dirty blonde is low-maintenance, it still requires a dedicated care routine to keep it looking fresh and vibrant. Neglecting proper care can lead to brassiness, dullness, or dryness.
- Sulfate-Free Products: Sulfates can strip hair colour and moisture. Opt for sulfate-free shampoos and conditioners specifically designed for colour-treated hair. Brands like Kérastase and Redken offer excellent ranges. Purple Shampoo: The Ultimate Guide to Cool Blonde Hair
- Toning Shampoos: Purple shampoo is essential for combating yellow tones in cooler dirty blondes, while blue shampoo is better for neutralizing orange tones that can appear in warmer shades. Use these once or twice a week, leaving them on for 2–5 minutes as directed.
- Deep Conditioning & Masks: Coloring processes, even subtle ones, can cause dryness. Incorporate a hydrating hair mask or deep conditioner into your routine weekly to restore moisture and strength. Look for ingredients like argan oil, shea butter, or keratin.
- Heat Protection: Always use a heat protectant spray or serum before styling with hot tools. Excessive heat can fade colour and exacerbate dryness, leading to breakage.
- Limit Washing: Washing your hair less frequently helps to preserve colour and natural oils. Consider using a dry shampoo between washes to extend your style and keep roots fresh.
Styling Your Dirty Blonde: Cuts and Looks That Shine
Dirty blonde hair truly comes alive with certain styles and cuts that highlight its multi-tonal nature. The dimension within the colour makes it incredibly versatile.
- Textured Waves: Loose, beachy waves or soft curls are perfect for dirty blonde. The movement in the hair allows the different shades to catch the light, creating a dynamic and natural look. Use a curling wand or sea salt spray for effortless texture.
- Layered Cuts: A layered haircut, whether long layers or a shaggy bob, enhances the interplay of light and dark tones. Layers add volume and movement, making the colour appear even more vibrant and dimensional.
- Sleek & Straight: While waves highlight dimension, a sleek, straight style can show off the smooth blend of your dirty blonde. Ensure your hair is well-conditioned and use a shine-enhancing serum to really make the colour pop.
- Braids & Updos: Braids, from fishtails to French braids, beautifully showcase the contrasting shades within dirty blonde hair. Updos with loose tendrils also work wonderfully, adding an elegant yet undone appeal.

A messy bun can highlight the subtle variations in dirty blonde, adding depth and texture.
Common Pitfalls When Going Dirty Blonde
While dirty blonde offers many advantages, there are specific mistakes to avoid ensuring you achieve the desired outcome and maintain healthy hair.
- Ignoring Undertones: The biggest mistake is choosing a tone (ash or golden) that clashes with your skin’s natural undertones. An over ash shade on warm skin can make you look sallow, while a too-golden shade on cool skin can appear brassy and unnatural. Always consult with your colorist about this.
- Uneven Home Application: If attempting at home, uneven dye application is a frequent problem. This results in patchy colour, especially noticeable with multi-tonal shades like dirty blonde. Professional application ensures even saturation and blending.
- Over-Processing: Whether at home or in the salon, over-processing hair (leaving bleach or dye on for too long) can lead to significant damage, dryness, and a compromised hair structure. This is particularly risky if you’re transitioning from very dark hair.
- Neglecting Toning: Dirty blonde, especially warmer variants, can develop unwanted brassy or orange tones over time due to mineral buildup or sun exposure. Failing to use appropriate toning shampoos or treatments will diminish the colour’s vibrancy.
- Skipping Deep Conditioning: Coloured hair needs extra hydration. Neglecting deep conditioning treatments will leave your dirty blonde looking dull, dry, and more prone to breakage, negating its natural, healthy appeal.
Expert Tips for Lasting Dirty Blonde Vibrancy
Achieving and maintaining a truly stunning dirty blonde isn’t just about the initial colour; it’s about smart, long-term care and strategic styling. Here are some insights to keep your shade vibrant.
- Master the Root Smudge: This is my favourite technique for dirty blonde longevity. When getting your colour done, ask your colorist for a ‘root smudge’ or ‘root melt’. They’ll apply a darker, cooler shade specifically formulated to blend seamlessly with your natural roots, then feather it down a couple of inches. This eliminates any harsh lines, making grow-out virtually invisible for months. It’s a key to truly low-maintenance blonde.

A well-executed root smudge is essential for a smooth grow-out and lasting dirty blonde vibrancy. - Protect from Environmental Stressors: Sun, chlorine, and even hard water can affect your dirty blonde. Wear a hat in direct sunlight, rinse your hair with fresh water before swimming in chlorinated pools, and consider a shower filter to combat mineral buildup that can dull or discolor your hair. According to Matrix’s expert advice on colour care, protecting hair from UV exposure is critical for maintaining colour integrity. Matrix (2024)
- Invest in Colour-Depositing Conditioners: Beyond purple or blue shampoos, consider a colour-depositing conditioner in a neutral or ash blonde shade. These can gently refresh your colour between salon visits, adding a subtle boost of tone without the commitment of a full dye. These are particularly useful if your dirty blonde starts to lean too warm.
- Regular Trims: While not directly related to colour, healthy ends are crucial for overall hair appearance. Regular trims prevent split ends from travelling up the hair shaft, which can make your colour look dull and unhealthy. Aim for a trim every 6–8 weeks, even if it’s just a dusting.
Frequently Asked Questions
What is the difference between dirty blonde and light brown?
Dirty blonde is fundamentally a blonde shade with darker undertones, appearing as a darker blonde. Light brown, however, is a brown shade that merely sits at the lighter end of the brown spectrum. The key distinction lies in the dominant pigment: blonde for dirty blonde, brown for light brown.
Can I go dirty blonde if I have very dark hair?
Yes, but it will likely require a professional colorist and multiple sessions. Lifting very dark hair to a dirty blonde shade can be a significant process, involving bleaching and toning, to avoid brassiness and achieve the desired multi-tonal effect safely.
How often do I need to touch up dirty blonde hair?
One of the main benefits is low maintenance. With techniques like balayage and root smudging, you can typically go 10–14 weeks between touch-ups, sometimes even longer, depending on your natural growth and desired blend. This is significantly longer than high-contrast blonde styles.
Does dirty blonde hair suit everyone?
Dirty blonde is incredibly versatile due to its range of warm and cool undertones. By choosing the right tone (ash, golden, or honey) that complements your skin’s undertones, most people can find a dirty blonde shade that looks natural and flattering on them.
What products should I avoid with dirty blonde hair?
Avoid shampoos and conditioners with harsh sulfates, as they can strip your colour. Also, steer clear of excessive heat styling without protection, as this can lead to fading and damage. Products with heavy silicones can also build up and dull your colour over time.
Will dirty blonde hair look good with fair skin?
Absolutely. For fair skin, an ash dirty blonde with cool undertones often works best, complementing the skin’s natural pink or blue tones without creating a harsh contrast. A subtle, soft golden dirty blonde can also add a beautiful warmth, depending on your specific complexion.
Conclusion
Dirty blonde hair offers a sophisticated, low-maintenance alternative to more demanding blonde shades. Its versatility, natural dimension, and effortless appeal make it a perennial favourite that continues to define contemporary hair trends. By understanding your undertones, choosing the right professional technique, and committing to a simple care routine, you can embrace this chic colour with confidence and enjoy its lasting vibrancy. Information current as of August 2026; pricing and product details may change.




Taming the Tresses: Your Expert Guide to Shampoo for Oily Greasy Hair

Beyond the Strip: Your Strategic Guide to Clarifying Shampoo

Conch Piercing: Your Complete Guide to Healing and Style

Blue Ombre Nails: Mastering the Gradient Manicure Trend

Optimising Your Complexion: The Power of PCA Skin Toner

Sabrina Carpenter’s Rolling Stone Cover: A Style &
-
 Style Tips & How-To1 month ago
Blue Ombre Nails: Mastering the Gradient Manicure Trend
-
 Style Tips & How-To2 months ago
Optimising Your Complexion: The Power of PCA Skin Toner
-
 Street Style & Celebrity Looks1 month ago
Sabrina Carpenter’s Rolling Stone Cover: A Style &
-

 Designer & Luxury1 month ago
Shopping in Rome: Your Stylish Guide to Italian Finds
-

 Outfit Ideas & Lookbooks2 months ago
Black Micro Shorts: Elevating Your Summer Style
-

 Street Style & Celebrity Looks1 month ago
Taylor Swift & Blake Lively: A Masterclass in Enduring Friendship
-

 Style Tips & How-To1 month ago
Body Wave Perm: Everything You Need for Perfect Waves
-

 Style Tips & How-To1 month ago
Stand Oil: Why It’s Not Always Your Best Artistic Ally